Arch Linux Installation (updated)
1. First, the CD will boot.
2. It shows the root console. 20130503: DHCP daemon automatically starts, so no need to call it manually. (old 20130208: Type in “ip addr” to confirm that the network address is configured properly (when connected using NAT).) Optional: modify /etc/pacman.d/mirrorlist to put the preferred mirror the first one.
3. (old 20130208: One situation I ran into was: “ip addr” doesn’t show any binding of IP address to eth0 (the virtual network adapter). Investigation shows dhclient doesn’t get a configuration either. As I ran the virtual machine in VMware, I checked VMnet8 (in Windows Control Panel, Network Adapters) and found it disabled. I enabled it but it still doesn’t work. I checked online for help, and finally found that the VMware NAT service and VMware DHCP service are set to “Manual” and are not started. I started them and set them to “Automatic”. dhclient can get the IP address by using “dhclient -v -r eth0; dhclient -v eth0”.)
4. Now I partition the hard disk if I haven’t done it before. I do it using cfdisk, which is quite handy. Usually, create a partition for the root file system (default type), and another for the swap partition (type 82). Then call mkfs.ext4 and mkswap for the partitions, respectively. btrfs can be tried, but will take more effort to make it bootable.
5. “cat /proc/swaps” to show the swap partitions in use. If not, use the swap partition on the hard disk just created (swapon /dev/sda2).
6. Mount the root partition at /mnt. Because ext2/ext3/ext4/reiserfs are automatically detected, we just need to do “mount /dev/sda1 /mnt” (suppose /dev/sda1 is the partition).
7. Because the corporate network uses proxy servers, I use “export http_proxy=http://proxy:port/” to set the proxy server setting. Also export HTTP_PROXY for better compatibility. Optionally put the settings in robbie_proxy.sh under /etc/profile.d to make it automatic upon logon.
8. “pacstrap /mnt base base-devel” to install the “base” and “base-devel” packages (base-devel is not required). More packages can be found at https://www.archlinux.org/packages/.
9. “arch-chroot /mnt pacman -S grub-bios”; it does chroot to /mnt, and then install the grub-bios as the boot loader (for BIOS rather than EFI architecture, which is the case with VMware Player).
10. “arch-chroot /mnt” and then follow steps in https://wiki.archlinux.org/index.php/Beginners%27_Guide#Wired to install the kernel modules (optional). Also follow the steps in the “Configure the network-> Wired” section (“systemctl enable dhcpcd@eth0.service”; Arch Linux uses systemd instead of System V init or BSD rc.d, so we call systemctl; start scripts are generated in /etc/systemd/). Optional: Enable “multilib” in /etc/pacman.conf as well so that 32-bit applications can also run on the 64-bit linux.
11. Install grub by using “modprobe dm-mod”, “grub-install –recheck /dev/sda”, “grub-mkconfig -o /boot/grub/grub.cfg”, and then configure according to https://bbs.archlinux.org/viewtopic.php?id=148038. Or, refer to the section https://wiki.archlinux.org/index.php/GRUB2#Install_to_440-byte_MBR_boot_code_region.
12. “genfstab -p /mnt >> /mnt/etc/fstab” to generate contents and append to the “fstab” file.
13. Follow steps in https://wiki.archlinux.org/index.php/Installation_Guide to set up the host name (/etc/hostname), time zone (ln -s … /etc/localtime), locale (locale.conf: LANG=”en_US.UTF-8″, LC_CTYPE=”en_US.UTF-8″, LC_TIME=”zh_CN.UTF-8″, LC_COLLATE=”zh_CN.UTF-8″, and generate the locale by modifying locale.gen and calling locale-gen). For the default setup, no need to do mkinitcpio (ramdisk image generation for the kernel). No need to configure the boot loader here, because we’ve already done it.
14. Some handy comments: modprobe <module>; modprobe -c; dmesg; lsmod; lspci; lspci -v.
15. It seems after installation I have to manually run dhcpcd upon every boot. This is annoying. I have used the right systemctl command but it still doesn’t work. Finally I found it’s because the device name (shown in “ip addr”) of the network adapter is not the same when booted from the hard drive than when booted from the CD. By fixing this (“systemctl disable dhcpcd@eth0.service”, “systemctl enable dhcpdc@enp0s17.service”) it works.
16. More:
1. Deprecated (try not to do this; install Arch Linux in one shot): After installing the basic ArchLinux system, because some time has passed since the first installation, I updated the whole system using “pacman -Syu”.
1.1 My common packages: pacman -S python2 python3 vim cifs-utils busybox
1.2 My customizing: mkdir /etc/vim; cpi /mnt/oldarch/etc/vim/vimrc.local /etc/vim; cpi /mnt/oldarch/etc/vimrc /etc (oldarch is the old Arch Linux virtual HDD)
2. I installed X Window System using “pacman -S xorg-server xorg-server-utils xorg-xinit xorg-twm xorg-xclock xterm”, by referring to <https://wiki.archlinux.org/index.php/Beginners’_Guide> or <https://wiki.archlinux.org/index.php/X_server#Installation>. During the installation, xf86-input-evdev (event device) will be installed.
3. I ran “lspci | grep VGA”, and found “VGA compatible controller: VMware SVGA II Adapter”.
4. Then I searched the ArchLinux package database for an appropriate video driver by running “pacman -Ss xf86-video | vim – -n”. I found “extra/xf86-video-vmware”.
5. I installed it by running “pacman -S xf86-video-vmware”. Reboot the system now (command “reboot”–I bet you’ll remember it the next time; to shut down, use “poweroff”).
6. X can now be tested with “startx”. Optionally, “startx — :1” start the X Window System on a different terminal, which can be switched to by using Ctrl+Alt+F8 (use the Ctrl and Alt keys on the left of the keyboard). Note that on VMware, you need to press Ctrl+Alt+(Space,F8) to do the switch. To switch back to one of the virtual consoles, you should use F1~F6.
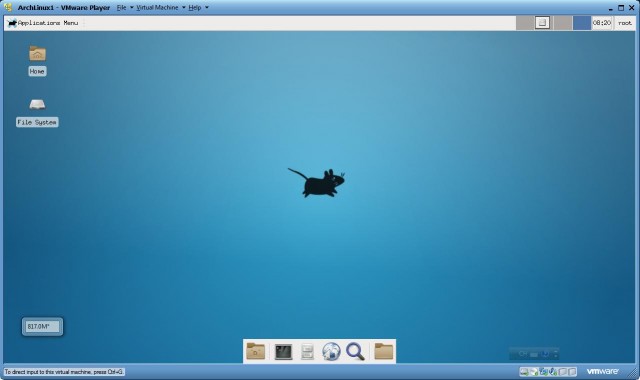
6.1 xfce4 can be installed with “pacman -S xfce4”. To start it, run “startxfce4”. It will take tty1 (and with display 0). To start another instance of it on tty2, switch to tty2 and run “startxfce4 — :1”.
7. Install GNOME by running “pacman -S gnome”. Here “gnome” is an package group, which contains packages.
8. There was some installation error or warning with GConf.
9. Copy /etc/skel/.xinitrc to the home directory (~) and then edit it to
enable gnome.

10. However, in April 2013, this approach doesn’t work. This is because xorg-server 1.14.2 doesn’t work with the vmware driver (hangs at GLX). It works with vesa driver when running on VMware, but vesa is not that flexible. A workaround that may or may not work (adding below lines to a file in xorg.conf.d to disable GLX; man xorg.conf for more information):
{
Section “Module”
Disable “glx”
EndSection
}
This workaround was found to work with the 20130503 vmware display driver installation.
10.1 As I tried, using xorg-server-1.14.0, startx now works and doesn’t hang after displaying the graphics. However, after startx, 1. all 1~6 virtual consoles are lost; 2. after quitting, the system hangs almost forever. (https://wiki.archlinux.org/index.php/Installing_Arch_Linux_in_VMware#Xorg_configuration)
10.2 To downgrade, I need to download the downgrade or downgrader software
from http://aur.archlinux.org/. As of April 2013, downgrader was quite buggy
(often segfaults or double frees memory).
10.2.1 In order to run downgrade, I need to install sudo and create a normal user as the sudoer. Check out:
http://www.muktware.com/5451/how-install-arch-linux
{
Now it’s time to create a user for the system and also add some groups to it. So run the following command and replace ‘muktware’ with your user-name.
useradd -m -g users -G wheel,storage,power -s /bin/bash muktware
Then give the password for this new user (which in my case was muktware). When you run this command it will again ask you to enter new password:
passwd muktware
Letting this user to perform administrative tasks as sudo. So, let’s install sudo
pacman -S sudo
pacman -Ss sudo
It will open the sudoers file where you have to uncomment this line:
%wheel ALL=(ALL) ALL
}
Explanation on the useradd command line above: -m creates the home directory; -g sets the initial group when the user logs on (as seen in the linux-intro e-Book); -G adds additional groups, among which “wheel” allows potential sudo; -s specifies the logon shell. More information at <https://wiki.archlinux.org/index.php/Users_and_Groups#User_management>. For /etc/sudoers, you first install sudo (not installed by default) and then edit it to uncomment group “wheel”.
10.2.2 Downgrading xorg-server to 1.13 requires downgrading xf86-input-evdev
also (downgrade/downgrader/pacman shows this dependency). Note that it will
prompt you when downgrading, whether to add the package to the exclude list in
pacman.conf. This means if you want to update this package in the future, you
need to restore it in /etc/pacman.conf. I downgrade xf86-input-evdev to
2.6.0-4.
10.2.3 xf86-video-vmware also needs to be downgraded. I downgraded it to
12.0.2-2.
10.3 Now I abort all the downgrades, and installed the latest version with
vesa driver (not vmware driver). And then I use “systemctl start gdm.service”.
It seems gnome can start. However, there is no other virtual console, and
logging in doesn’t work.
11. My development environment: “pacman -S jdk7-openjdk mono”.
12. Official VMware tools do not fit Arch Linux. Run “pacman -S open-vm-tools open-vm-tools-modules” instead.
Notes:
1. Sometimes the local package directory may become out of date. In this case, some packages will be 404 not found on the package server. I tried “pacman -Syu” first, and then I can install that updated package.
Further references:
http://en.wikipedia.org/wiki/Init
http://en.wikipedia.org/wiki/Runlevel
http://aplawrence.com/Basics/unix-startup-scripts-2.html
http://en.wikipedia.org/wiki/Systemd